To manually configure your chart of accounts, navigate to Finance > Chart of Accounts and press Get started. 
Silo will auto-create a basic set of accounts for you. You can edit or delete these auto-created accounts as needed during initial setup. However, once you finalize your chart of accounts, accounts can no longer be deleted.
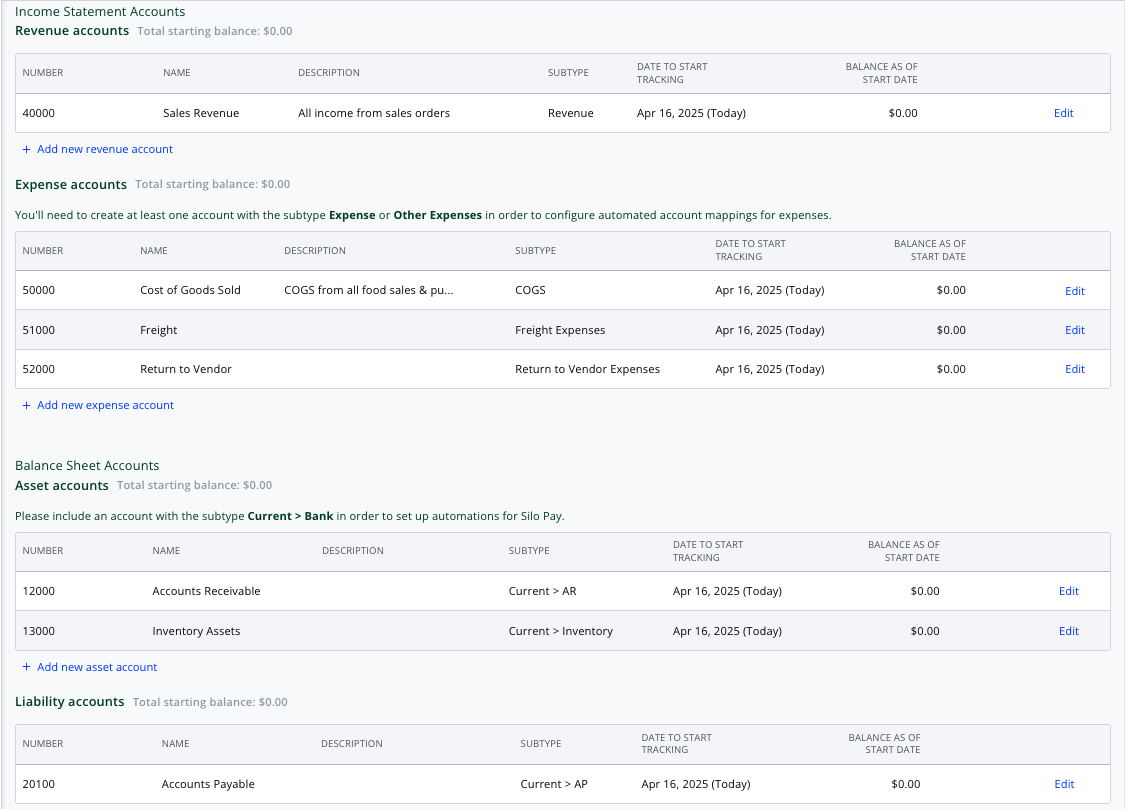
To create more accounts, press the Add new link under the relevant section (Revenue, Expense, Asset, Liability, or Equity). Enter in details about the account, including the name, number, date to start tracking (defaults to today's date), balance on start date (defaults to $0), and description (optional). You can always come back and edit these values later.
Some useful accounts to add:
- Asset account of subtype Current > Bank: these will appear as an options in the Deposit To field when recording manual customer payments and in the Payment Account field when recording manual vendor payments. Without an account of this type, users won't be able to record payments.
- Liability account of subtype Current > Credit Card: these will appear as an options in the Payment Account field when recording manual vendor payments.
- Expense account of subtype Expenses or Other Expenses: these will appear as options in the Expense Account field when creating expenses and non-inventory items on purchase orders. They can also be used to configure Expense Account Automations.
If you already have a list of all your account numbers, names, types, and starting balances, reach out to your Silo representative—they may be able to help you import your account information instead of manually creating each account.
Once you've created all of your accounts, make sure the total starting balance for all of your Asset accounts is equal to the sum of your Liability and Equity accounts. If you do not start with your accounts balanced, you will not be able to continue to the next step.
To finalize your account setup, press Save and set up automations in the bottom right to proceed to the next screen.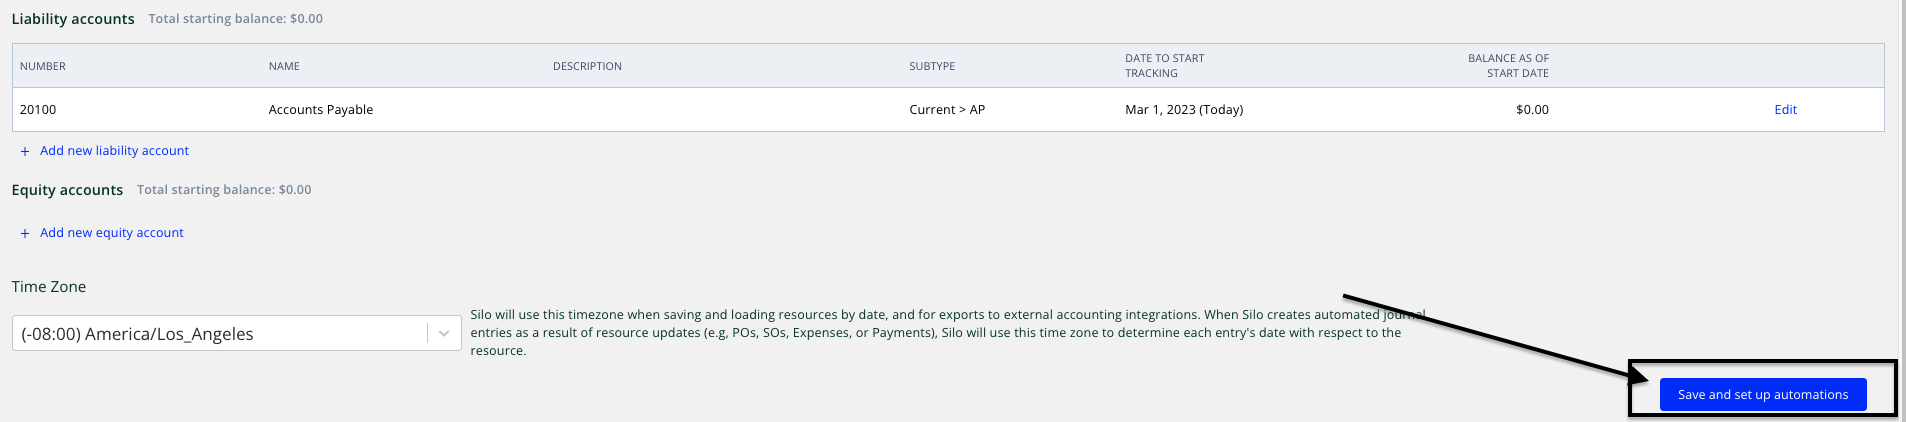
On the Automations screen, you can configure which accounts will be used for automated journal entries when you document orders, payments, and expenses in Silo. All fields on this screen are required. Once you're done configuring all automations, press Save in the bottom right of the screen. You're now done configuring Silo accounting!