Introduction
You can scan the barcode on Silo's pallet labels to lot any unassigned items on confirmed sales orders. This article outlines the requirements for scanning and the most optimal workflow.
Requirements
- Contact Silo: Scanning is currently a locked feature. Reach out to your Silo CSM to have it turned on. At this time, there is no additional charge for this feature.
- Scanner: You must have a scanner that connects to a computer (USB or Bluetooth) and it must support reading 2D datamatrix codes. Silo uses this scanner internally and can confirm it supports our workflow. It is also available for sale on Amazon.
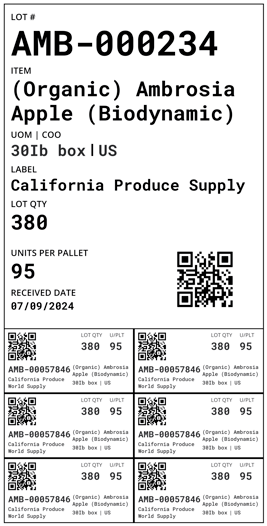
- Pallet labels: You must have Silo's Pallet Definitions feature turned on and be using Silo's pallet labels, which have been updated to include barcodes. Review this article to learn more about these labels. We do not currently support scanning other types of labels such as PTI or lot labels.
Setting Up Your Scanner
Silo requires a few one-time configurations before utilizing our scan to lot workflow.
You must configure the following:
- Prefix = [
- Suffix = Enter key (for many scanners, including the recommended scanner, this is already the default)
If you purchased the same scanner as Silo (Tera D5100), take the following steps:
1. Plug in your scanner to the computer that you plan on using the scanner for
- You need to plug in the transponder, the cable is meant for charging.

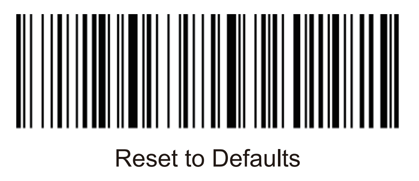
2. Reset your scanner to factory defaults by scanning this barcode
3. Set the scanner to prefix mode by scanning this barcode

4. Add the [ character as a prefix by scanning this barcode 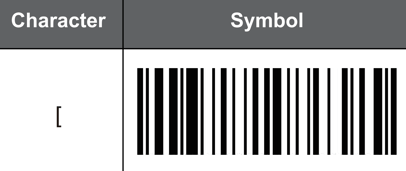
Wait 30 seconds
Test your scanner to ensure it is configured correctly
You can confirm that the prefix and suffix are configured correctly with the following steps:
- Open a text editor, such as the Notepad app on Windows or the Notes app on Mac.
- Scan the following 2D barcode:

- If you've correctly configured your scanner, you should see the text "[791940" and the keyboard cursor should be on the next line.
How to Use Scanning on Silo
1. Apply pallet labels to each of your lots
These can be printed from the PO screen or the Lot Details window.
2. Pick inventory for unlotted sales orders
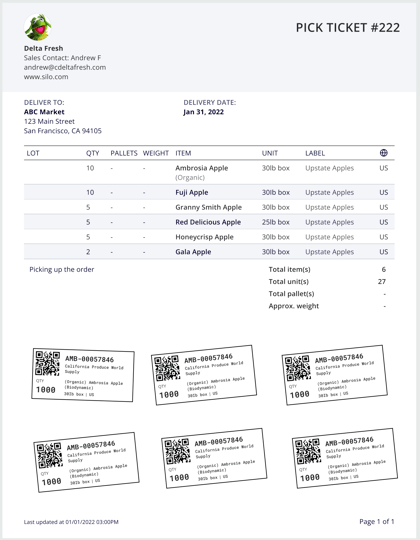
Your pickers should apply the "child" sticker from each pallet used to the pick ticket so they can later be scanned.
3. Scan to lot
Open the sales order and press Scan to assign lots in the footer. Note that this will only appear on confirmed orders and will disappear once the order is fulfilled or cancelled.

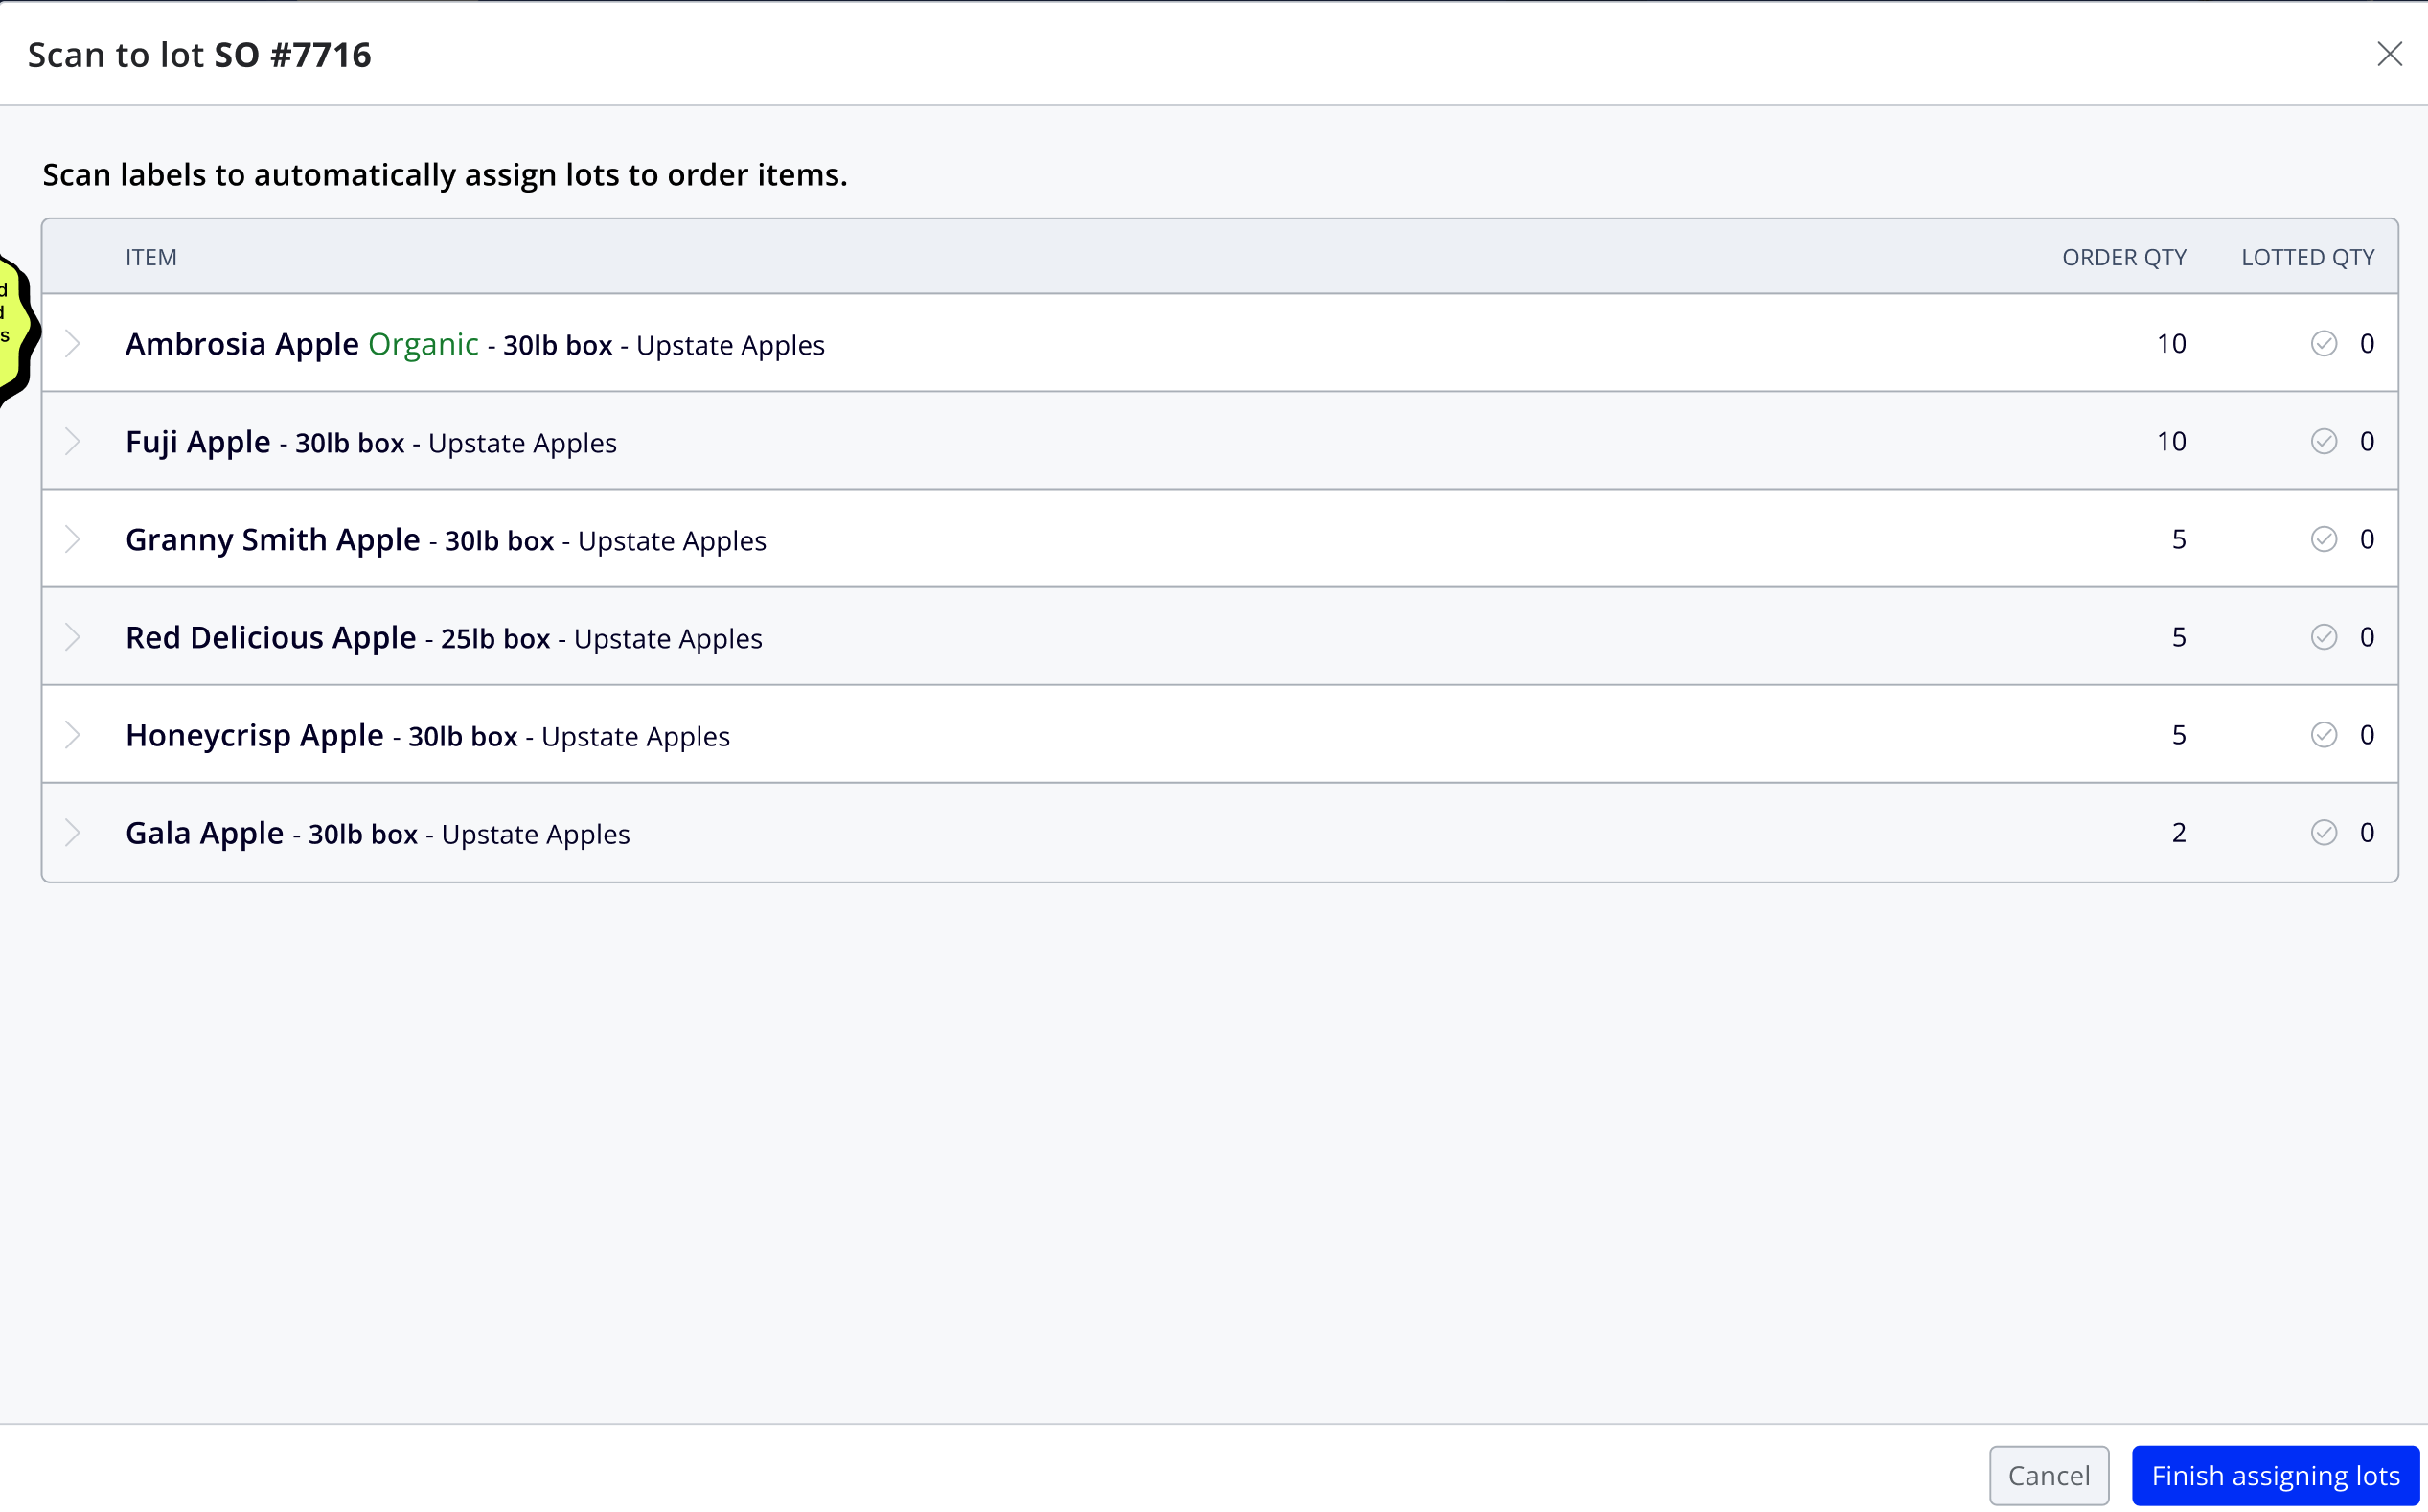
A window will open displaying all of the order items, their quantities, and the lotted quantity for each item. You can now begin scanning the barcodes on the pallet stickers to lot each item.
As you scan, you should see the scanned lot appear below the correct item. By default, the assigned quantity is set to either the available quantity of the lot or the unlotted quantity of the order item, whichever is lower. Once an item is fully lotted, you will see a green checkmark appear.
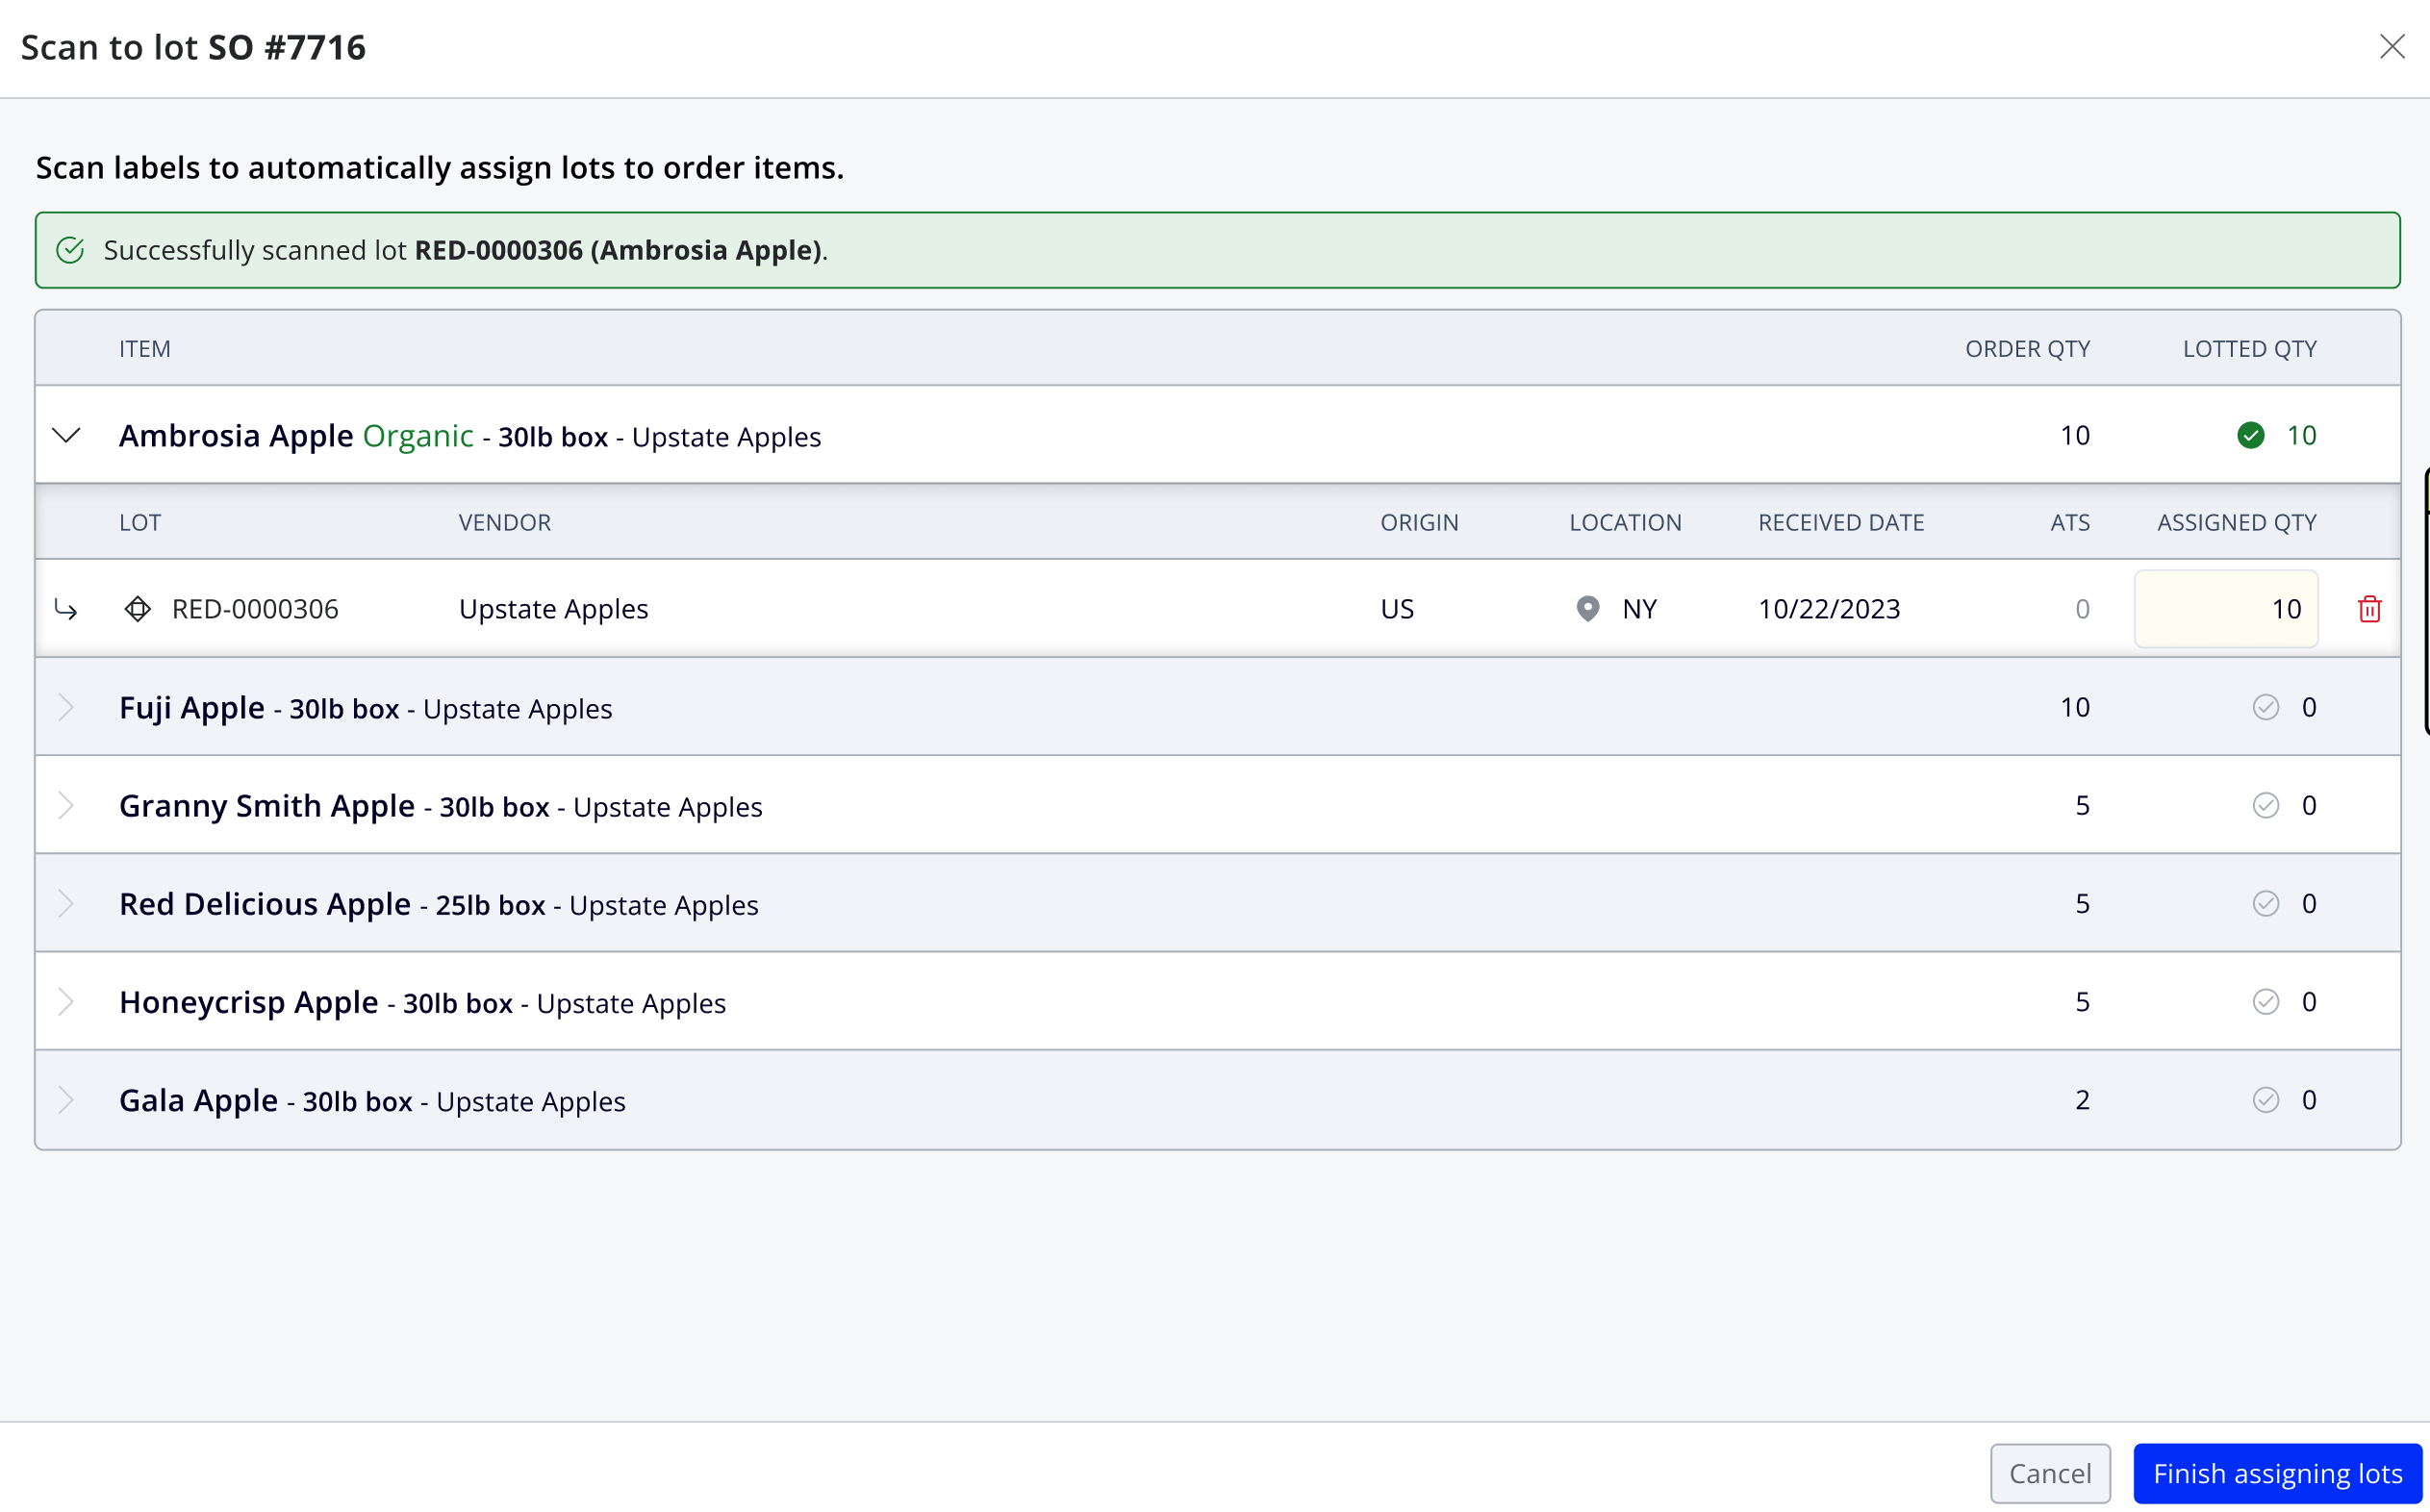
When you're finished, press Finish assigning lots to save your changes and return to the sales order.
FAQs
1. What else can scanning do?
At this time, we only support scanning to lot unlotted sales orders. We are considering additional functionality. If you have a request, please submit it to your CSM.
2. Do I have to buy the scanner that you recommended?
No. You can use any scanner as long as it connects to a computer and supports 2D datamatrix scanning.
3. Do I have to use pallet labels?
Yes. They are the only labels that contain the datamatrix barcode required for scanning.
4. I have multiple scanners in the same warehouse, will there by interference?
If you are using the scanner that Silo tested with (Tera D5100) there shouldn't be but please see page 4 of this manual if you are having any trouble.