To create a check payment
- Navigate to Finance > Expenses > Payments
- Press Pay vendor in the top right of the screen
- Select the correct vendor and switch to the Record Manual Payment tab
- Enter the payment amount, set the method to Check, select a payment account (required if using Silo Accounting), and confirm that the payment is applied to the correct invoices
- Press Record payment
To print the check
- Locate the payment you just recorded on the Finance > Expenses > Payments screen
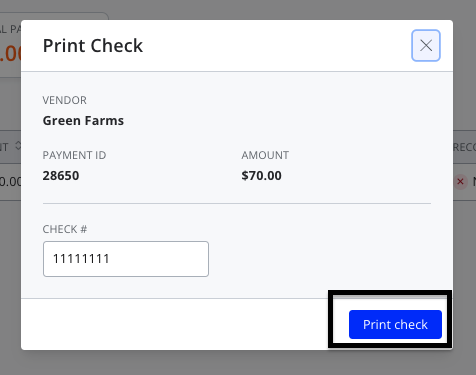
- Click the Check link in the Method column (it should display in blue with a print icon)
- Make sure you've entered the check number, then click Print check
These steps can also be used if you need a check to be sent to Canada. However, if you would like to see the ability to send international payments through Silo, please let our support team know, and they will pass on your feedback.
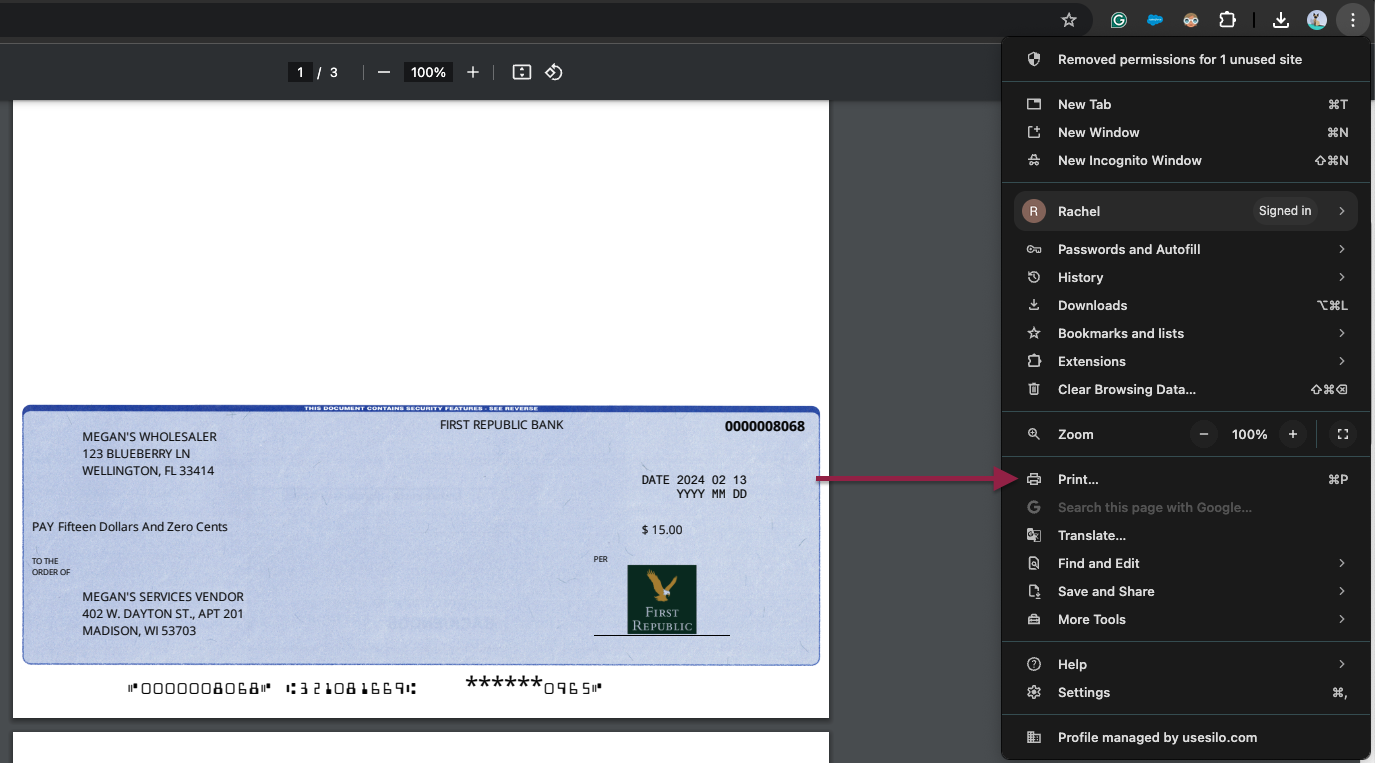
To adjust your print settings in Chrome (if needed)
- Click the Customize and Control button on the browser toolbar.
- Choose Print, and the Print Preview appears.
- Choose the desired print settings (see below for print settings), then click Print to start printing.