Introduction
Silo's repacking workflow aims to provide flexibility and visibility into what you are repacking. This walkthrough is intended to show you how to use this workflow.
Creating a Repack
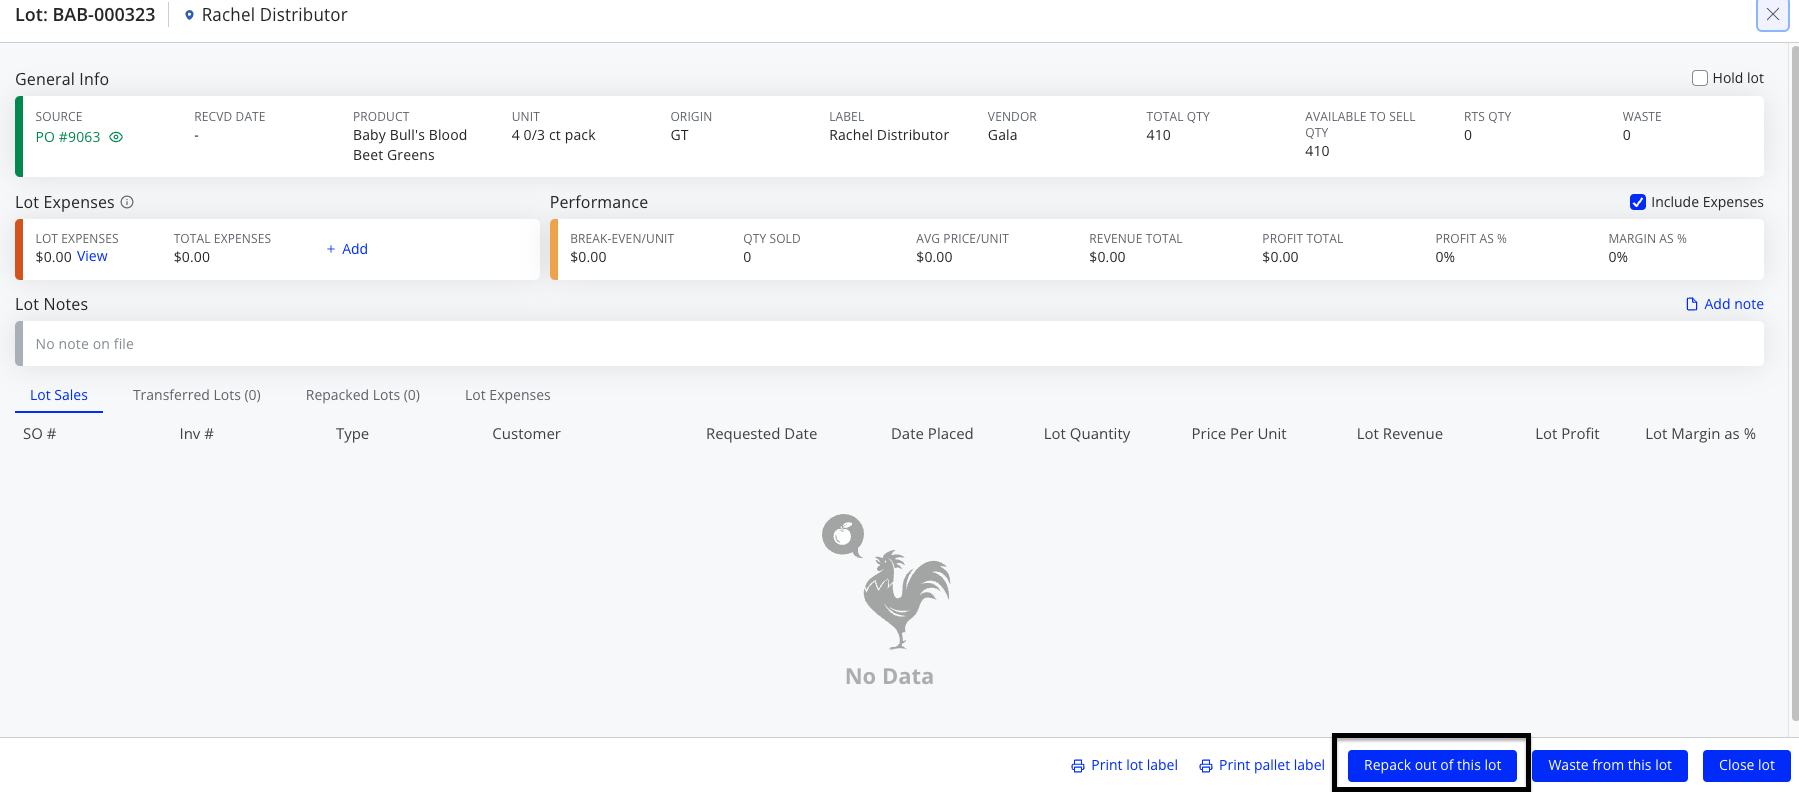
Step 1: Start the repacking process
To start a new repack, press the Repack out of this lot button on the Lot Details screen or the Create repack button on the Repacks screen.
Step 2: Determine which input lots and how many units to use
If you start a repack from the Lot Details modal, the Create Repack window will open with a field where you can enter the quantity of units that will be repacked and add additional input lots. The maximum quantity available to repack is shown below the field and is the same as the Available to sell quantity on the Inventory screen.
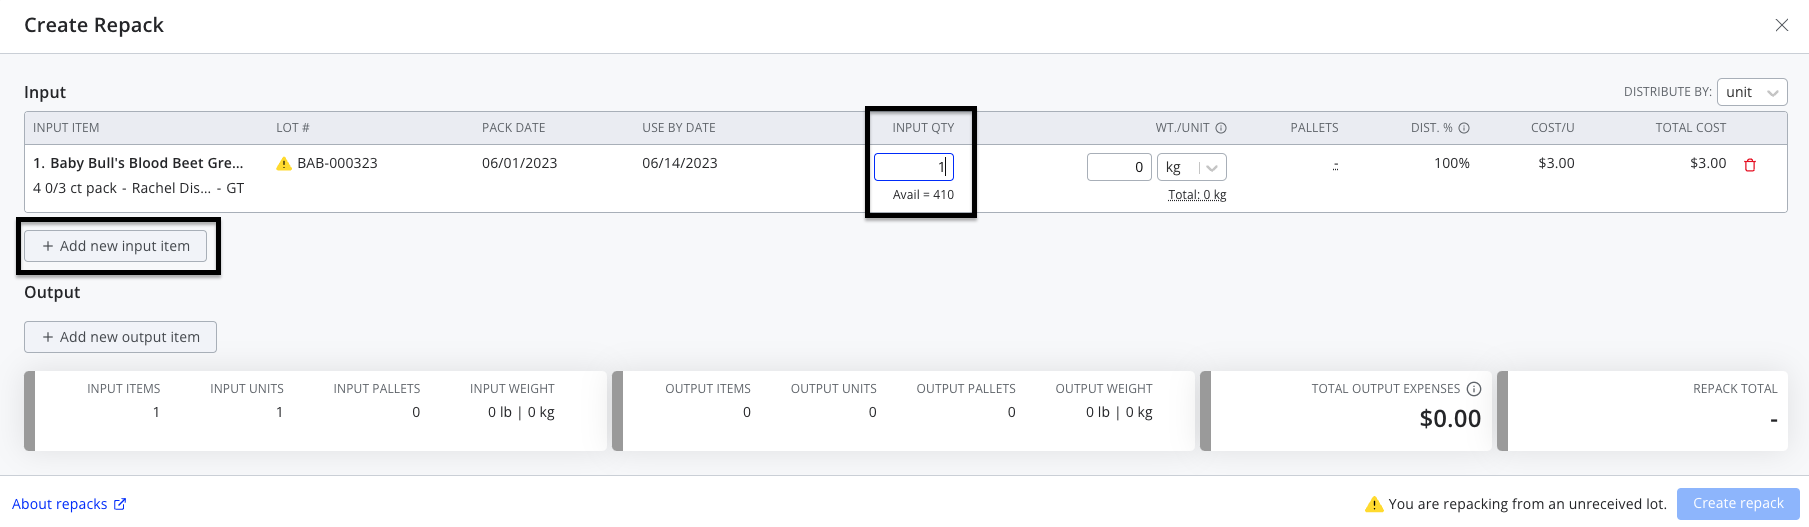
If you start from the Repacks screen, or if you want to add multiple inputs, you'll need to use the Add new input item button. This will allow you to add additional input lots to the repack.

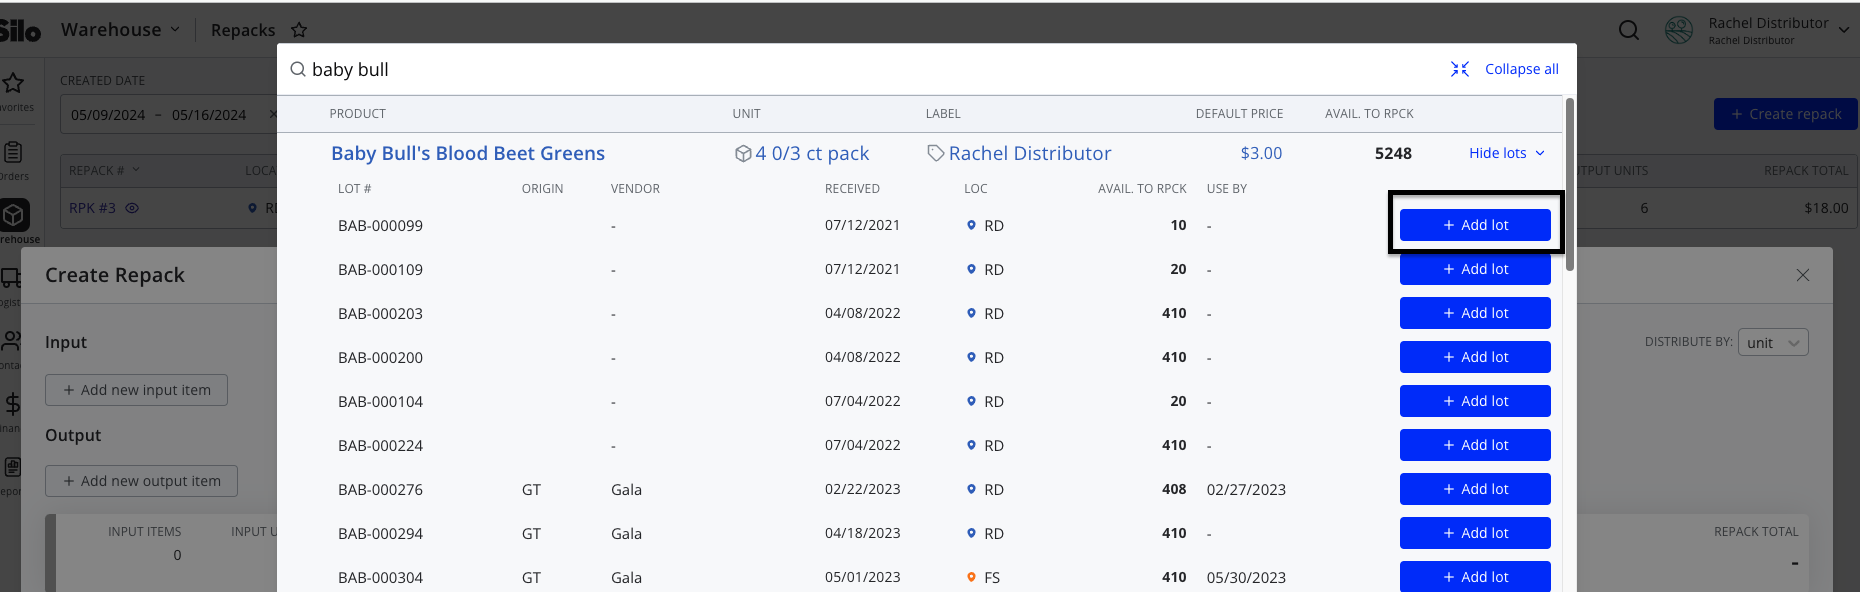
Each input lot you add must have an input quantity specified.
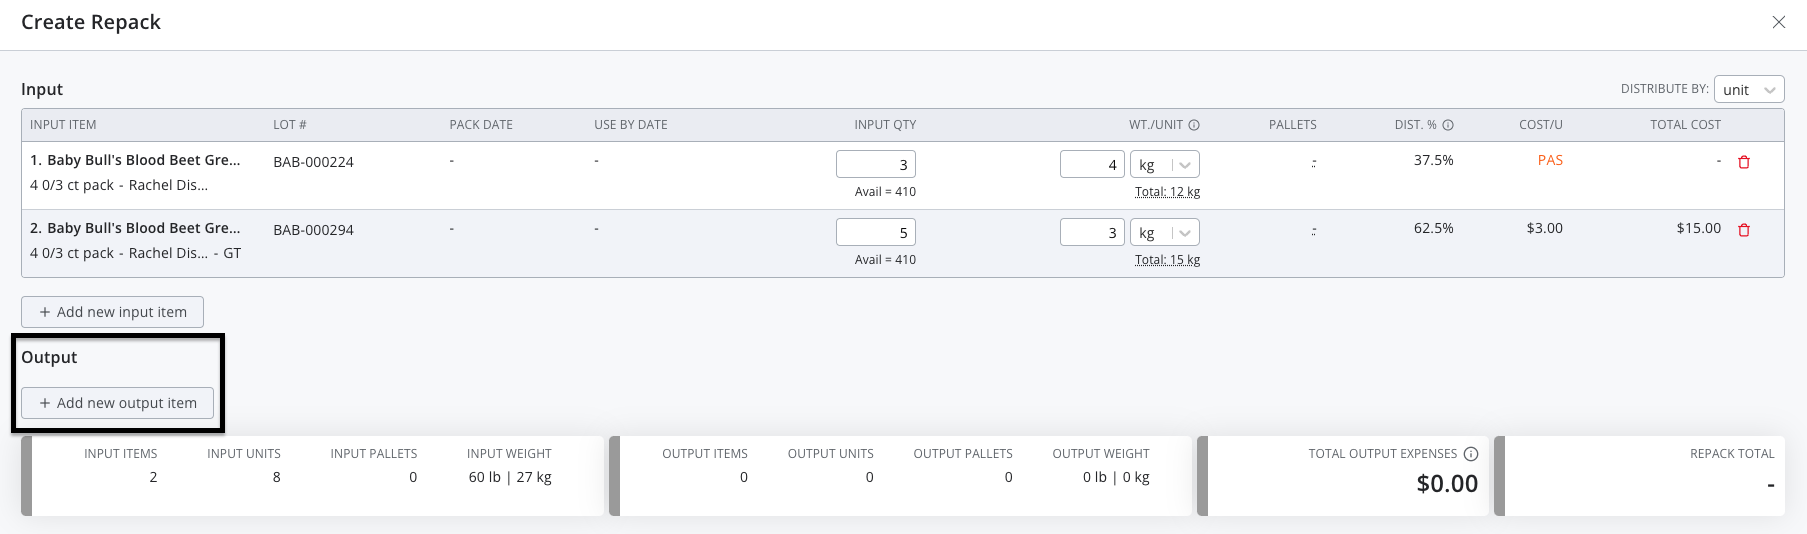
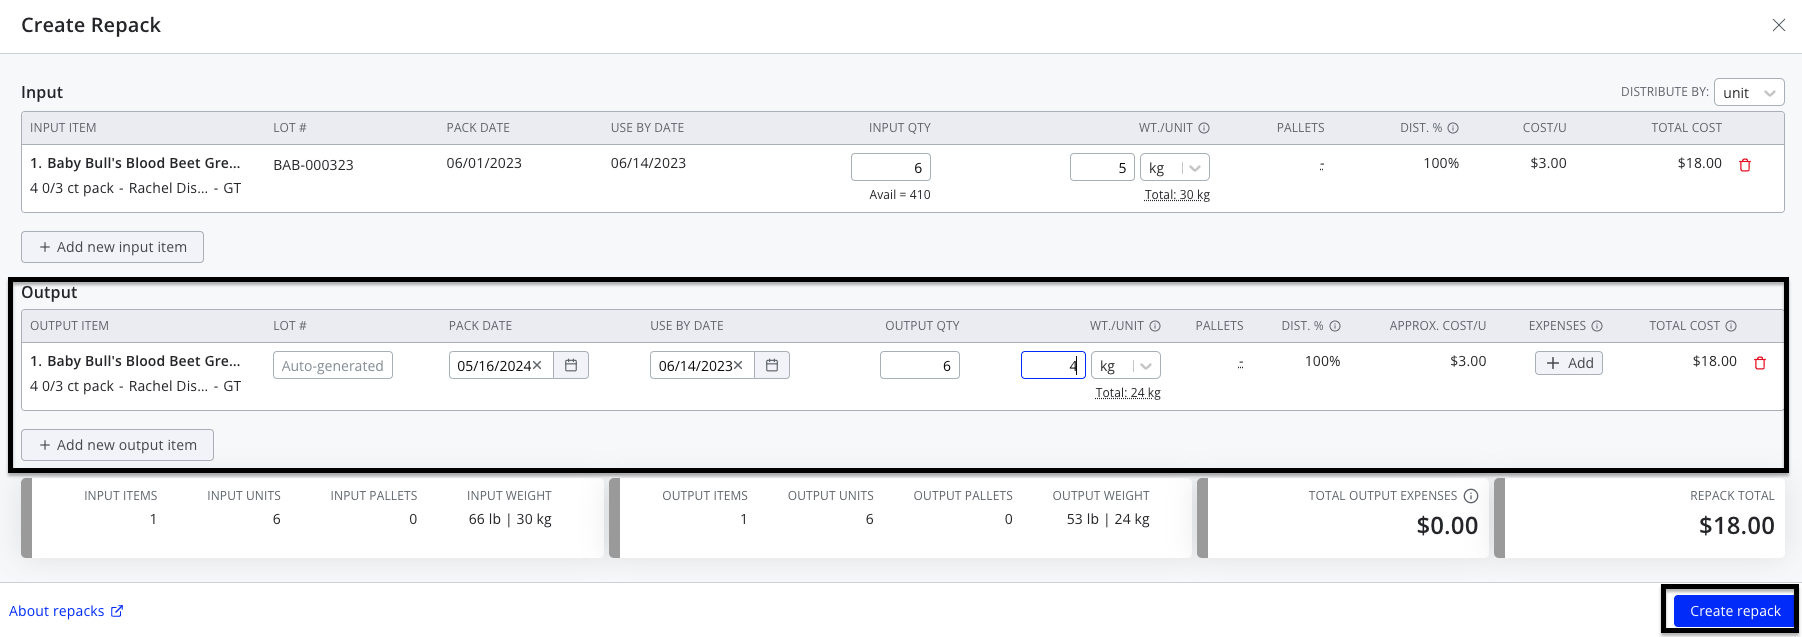
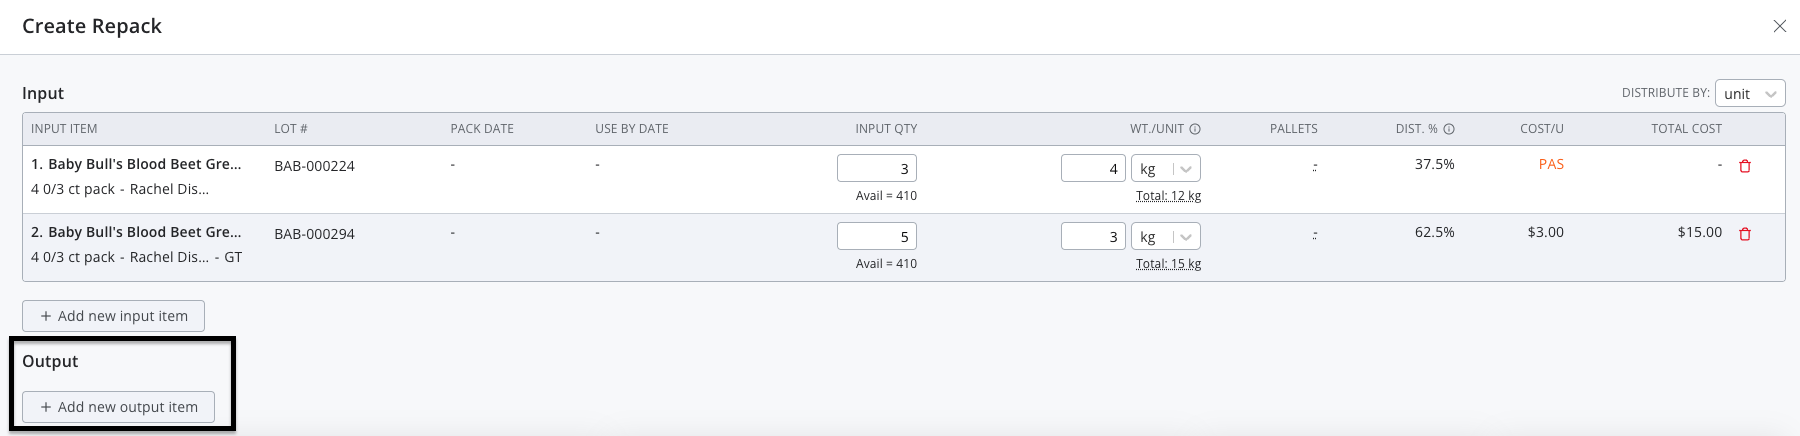
Step 3: Choose output inventory items
Press the Add new output item button to open an inventory search where you can select the correct output items.
You can search for the product, unit, and/or label of the item you want to create from the repack and click Add to select the correct item. If you can't find the inventory item you are looking for, you can press Add new inventory item in the bottom right corner of the search window.

You can continue adding additional outputs by clicking Add new output item.
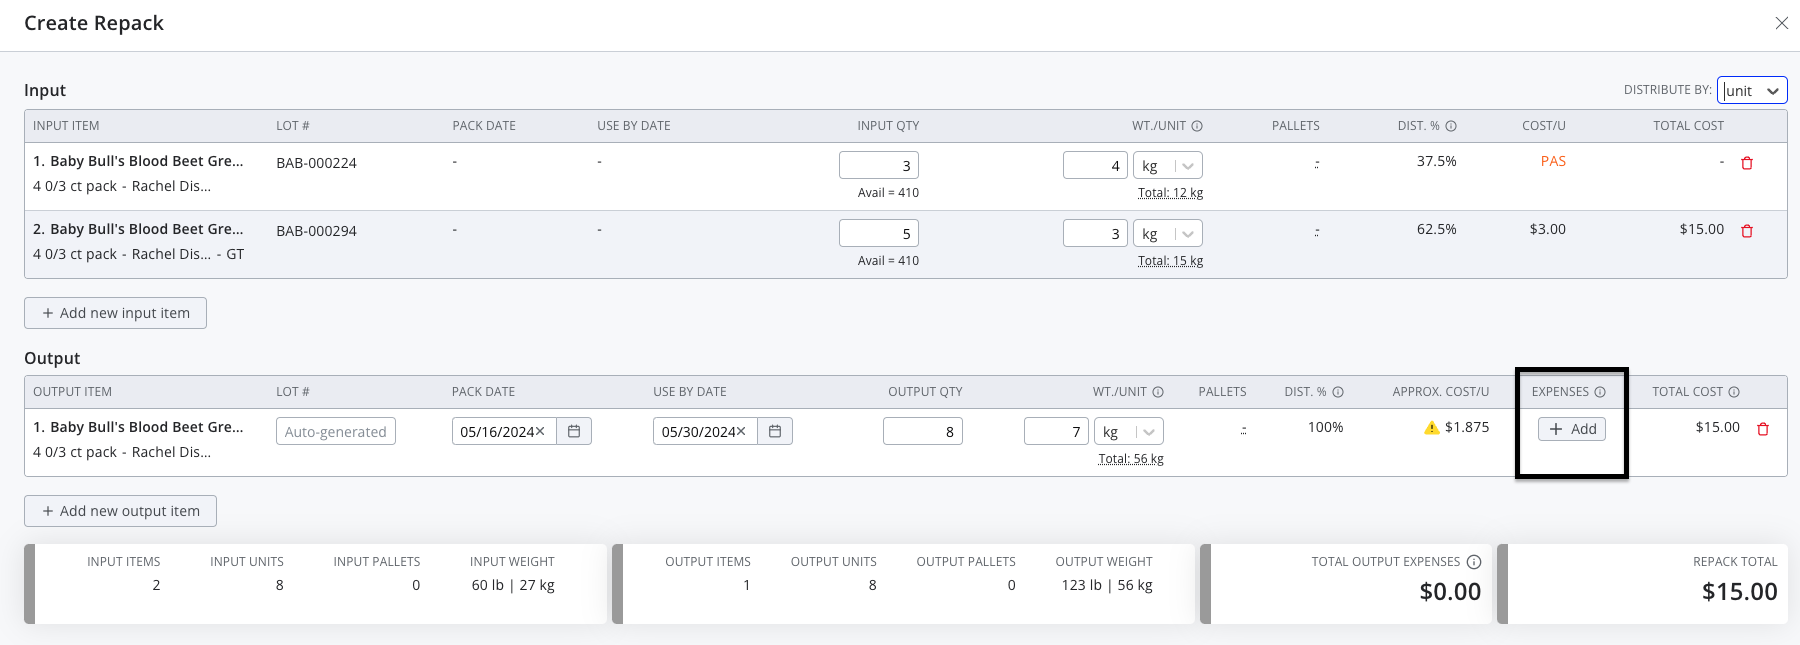
Step 4: Customize output lots
Any output items you've added now appear in the Create Repack screen with a few fields for you to edit:
- Lot number: Type a custom lot number for the repacked lot. If this field is left blank, a lot number will be auto-generated based on your settings. To learn more about the available numbering options, go to Settings > Inventory and view the "Repack lot number generation method" setting.
- Use by date: Select the date by which the repacked lot should be used. If the input lot has a use-by date, it will default to this field.
- Pack date: Select the pack date for your output lots.
- Output qty (required): Enter the number of units of output item created from this repack.

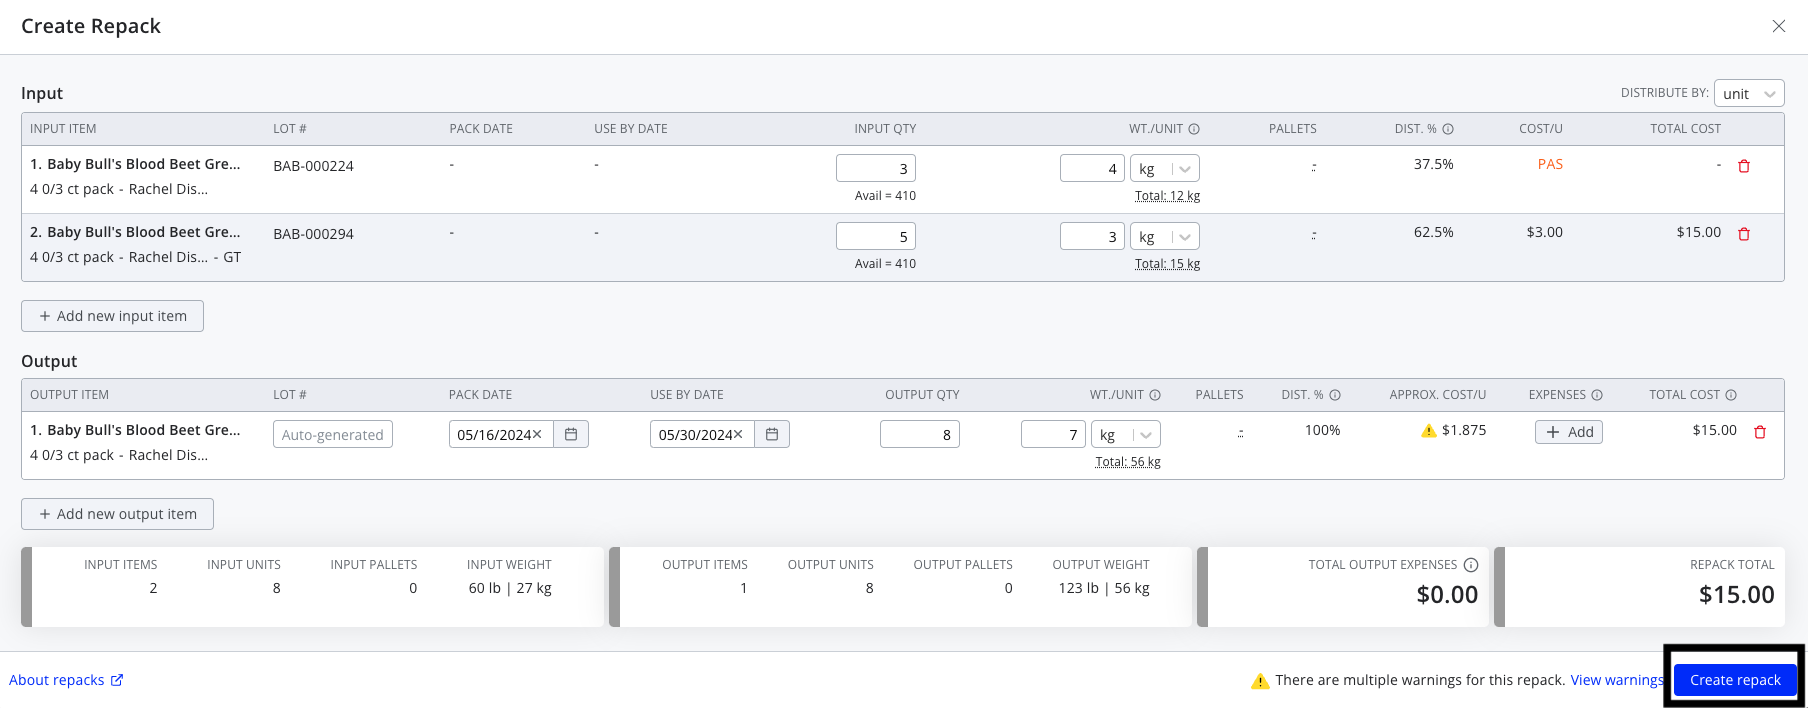
Step 5: Choose your distribution method
Silo offers two ways to distribute costs, expenses, revenue, and inventory counts between inputs and outputs. Check out the Guide to Repack Math to learn more about each method.

Step 6: Add output expenses
If expenses are associated with creating the repack, consider adding them to the output lots using the Add buttons.
After repacking, you can also add them by opening the Lot Details window for each output lots.
Step 7: Create the repack
Once you've configured your input and output lots and chosen a distribution method, press the Create repack button to complete creating the repack.