Users of Silo Accounting who have configured their chart of accounts can utilize the Bank Reconciliation screen to streamline their reconciliation workflows. To get started, navigate to Finance > Reconciliation and determine the date from which you’d like to start reconciling in Silo.
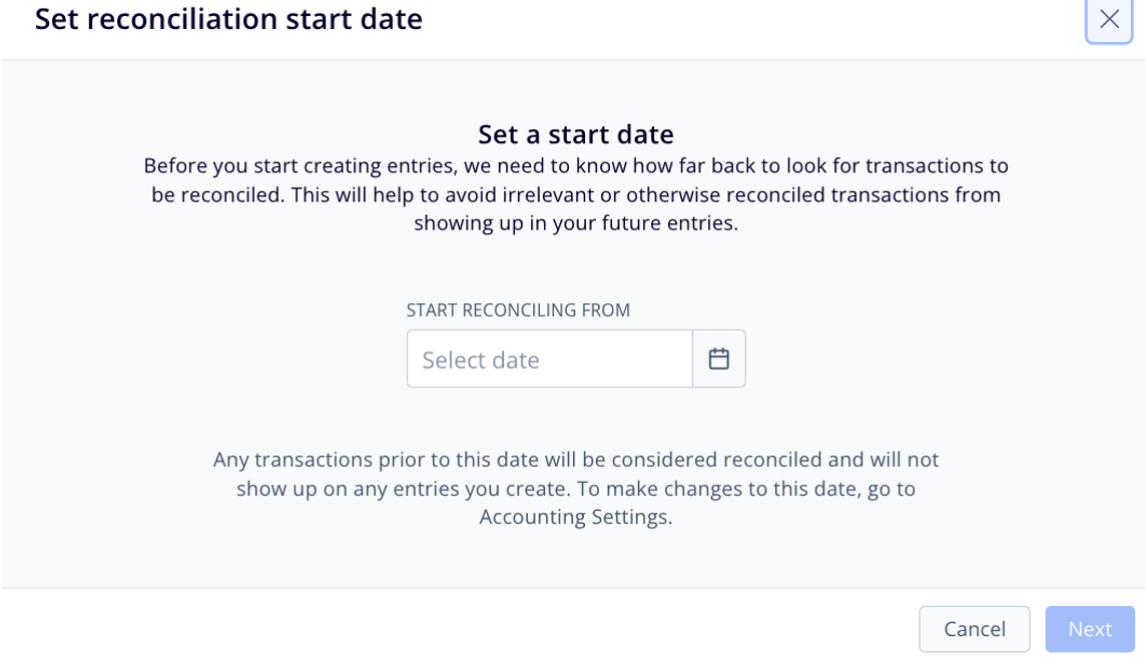
For example, if you have already manually reconciled through June 30th, you may want to do your first reconciliation in Silo for July and not want to see transactions you’ve already reconciled. To do this, you'd set the reconciliation start date to July 1st. This date can always be edited later if necessary from Settings > Accounting.
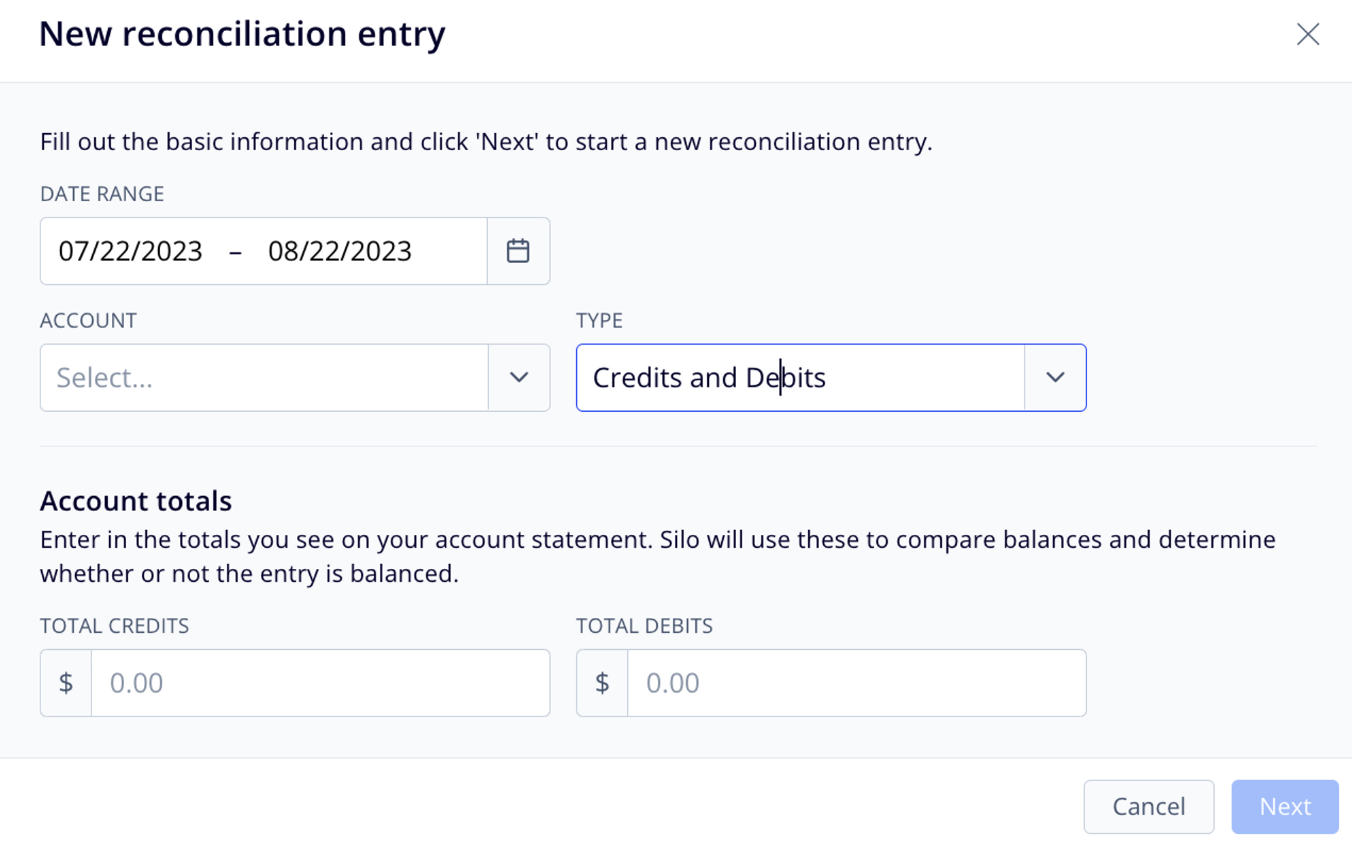
After you set a start date, you can proceed with creating your first reconciliation entry. You will be prompted to enter a date range (defaults to one month ago through today), select the account you are reconciling, and choose what you want to reconcile (credits and debits, credits only, debits only, or the overall balance for the time period).
The next step is to select the transactions that you have reconciled. Note that the list will show all transactions in the selected date range, as well as all unreconciled transactions from the reconciliation start date to the beginning of the date range. For example, if your reconciliation start date was July 1st, and you started a new reconciliation entry for July 22nd - Aug 22nd, you would see a list of all unreconciled transactions from July 5th - July 22nd, as well as all transactions from July 22nd - Aug 22nd.
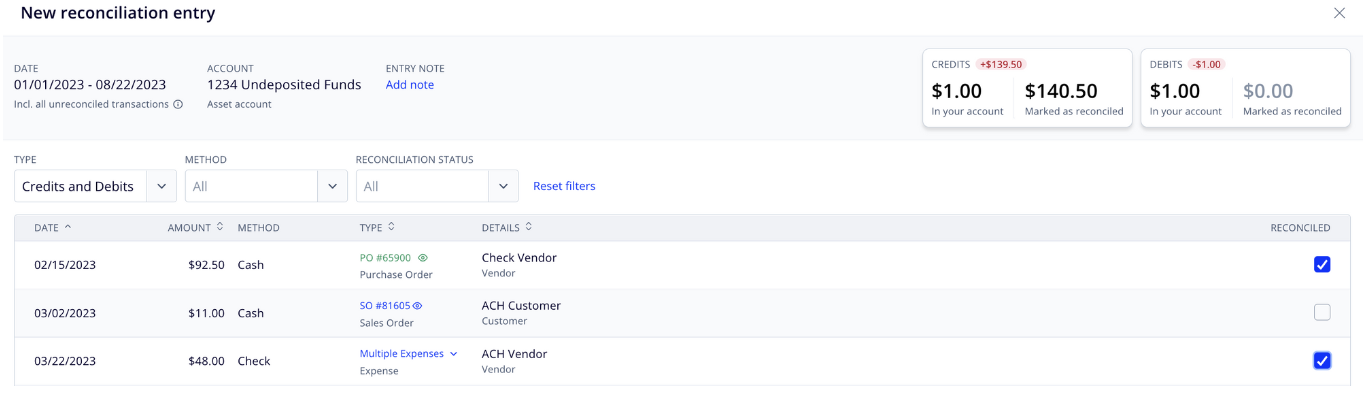
As you select transactions, the totals shown in the top right corner of the window will update, as well as the indicator showing either 'Balanced' or how far from balanced your total reconciled transactions are.
When you are done selecting transactions that you've reconciled, press Save. The new reconciliation entry will now appear in the list view.
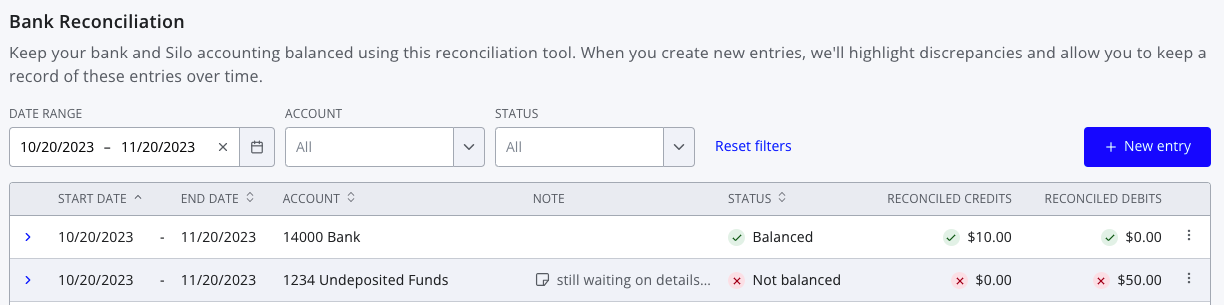
If you need to view or edit an entry after creating it, you can do so by pressing the three vertical dots on the right side of the row and selecting View entry.